

FileChucker
Frequently Asked Questions
See also: Shared FAQ
The Basics
How do I configure/customize FileChucker?
How do I change FileChucker's styling?
How do I use the /upload shortcut URL?
How do I embed FileChucker in another page, or within my site's existing layout?
How do I embed FileChucker's sub-pages, such as the download page?
Errors
I get an Internal Server Error!
I get an "undefined function virtual", "request execution failed", or "exec disabled" error.
I get an error in the middle of my upload, or it never finishes.
FileChucker's upload progress bar doesn't work.
FileChucker's upload progress bar doesn't work in Safari.
I use Network Solutions and I'm having trouble.
FileChucker won't thumbnail a certain image file; or, FileChucker's file-list page gets cut off partway through the list.
My FileChucker installation has been hacked!
My FileChucker installation is getting spammed!
Performance
What's the biggest file that FileChucker can upload?
How fast can FileChucker upload files?
FileChucker seems to be using a lot of server CPU/RAM.
How secure is FileChucker?
Features
Can you add feature XYZ to FileChucker?
How do I enable the image features (thumbnails, rotation...)?
How do I add my own fields / text boxes to the upload form?
How do I enable email notifications, or fix email-sending errors?
How do I add an email field and send a notification email to the entered address?
How do I make my form fields appear in the notification email?
How do I make my form fields appear on the Downloads/file-list page?
How do I use one FileChucker for multiple forms/pages on my site?
How do I get direct-download links instead of CGI-based download links?
How do I prevent direct downloads?
How do I set or reset my password?
How can I hide or password-protect certain features?
How do I give each of my users their own private folder for uploads and/or downloads?
How do I specify custom folder permissions?
How do I pass external data to FileChucker?
How do I pass URL variables from php/shtml to FileChucker?
FileChucker (sometimes) says I'm not logged in, when I really am!
How do I select multiple files at once for upload?
How do I ...
Integration
How do I integrate FileChucker with UserBase?
How do I integrate FileChucker with CornerStore?
Can I make FileChucker work with my existing login system?
Does FileChucker work with iWeb, or other 3rd-party website editors?
How do I integrate FileChucker with WordPress?
Does FileChucker work with Drupal?
The Basics
How do I configure/customize FileChucker?
Just use WebConfig: log into FileChucker with your admin password, then go to the Settings page, and do all your configuration there, via web browser. WebConfig is available in FileChucker v5 and newer (get the latest version here). In older versions, you configure the app by editing its prefs file (and you can still do this in newer versions if you prefer). Here's how:
Edit your filechucker_prefs.cgi file in a text editor. This file is normally in your server's cgi-bin directory, or it may be in your upload directory on Windows servers. The prefs file contains many adjustable settings along with documentation for them. For example, you may want to adjust $PREF{title} in PREFs Section 07.
You'll notice that many lines in the prefs file begin with a "#" character. These lines are inactive "comment" lines containing instructions and examples, so don't change anything on them, because it won't have any effect on FileChucker. If you see a pref that you want to adjust, but it's on an inactive line, that usually means it's just an example included as part of the documentation, so you should look for another instance of that same pref on a line that doesn't begin with a "#" character – that will be the active version of the pref, so that's the one you should adjust.
If you're feeling adventurous, you can also edit the app's code, in the filechucker.cgi file. This isn't necessary in 99% of cases, but if you're a programmer and want to modify it, you can. Just be sure to make a backup copy first.
[ Top – FC Homepage – Instructions – Download – Buy ]
How do I change FileChucker's styling?
To customize the styling (look and feel), you can change $PREF{default_app_style} from light to dark; or, adjust $PREF{css} in PREFs Section 16 if you want to manually tweak the CSS styles. To include an external CSS file, use a CSS @import statement:
\@import url("/mystylesheet.css");
[rest of FileChucker's CSS here]
`;
Notice that the @-symbol on the @import statement must be escaped with a backslash, otherwise Perl will treat it as a variable, which will result in an error.
[ Top – FC Homepage – Instructions – Download – Buy ]
How do I use the /upload shortcut URL?
On most servers, you can use www.yoursite.com/upload instead of www.yoursite.com/cgi-bin/filechucker.cgi to access FileChucker. But first, you must get the full filechucker.cgi URL working. Once that's working, you can try these shortcut URLs:
www.yoursite.com/upload/index.shtml
If one or both of those works, then delete the index file that doesn't work (if any), and then you should be able to use this shorter URL:
If neither index page works, then try www.yoursite.com/upload/call_fc.php instead. If that works, then edit the index.php file, remove the "#" from the front of the call_fc line, and add a "#" to the front of the virtual line. Now www.yoursite.com/upload/index.php should work, and if you delete the index.shtml file, then www.yoursite.com/upload should work too.
If your server runs IIS rather than Apache, you can also use the Default Content Page feature to enable the shortcut URL. Open your IIS manager, find the /upload/ directory, right-click on it and choose Properties. Go to the Documents tab, check the "Enable default content page" box, and add "filechucker.cgi" to the top of the list.
If the short /upload URL works on your server using one of the above methods, then set $PREF{here} to '/upload/' in your prefs file.
If your server doesn't support any of the above methods, and you don't want to upgrade to a better hosting company, then you can use the not-quite-as-nice META Refresh method. Copy the /upload/index-redirect.html file to /upload/index.html and then edit the index.html file. In it, replace "mysite.com" with your domain name. Now yoursite.com/upload will auto-redirect your visitors to yoursite.com/cgi-bin/filechucker.cgi.
[ Top – FC Homepage – Instructions – Download – Buy ]
How do I embed FileChucker in another page, or within my site's existing layout?
Embedding Method A: call filechucker.cgi from your PHP or SSI/shtml page:
- First make sure FileChucker is installed and working: visit yoursite.com/cgi-bin/filechucker.cgi and you should see the upload form. If not, you need to fix that before trying to embed it. Important note: if you install FileChucker in a non-standard location (somewhere other than yoursite.com/cgi-bin/filechucker.cgi), then you'll need to adjust the "/cgi-bin/filechucker.cgi" throughout these instructions, to match wherever you've actually installed it.
-
Within the <head> section of the PHP or SSI/shtml page where you want to embed
FileChucker, add the following two lines:
<script type="text/javascript" src="/upload/appdata/fc.js"></script>
<link rel="stylesheet" type="text/css" media="all" href="/upload/appdata/fc.css" />
If you're using an older version, you won't have the fc.js and fc.css files in the /upload/appdata folder on your server, so you'll need to create them. -
If your page is a PHP page, then add the following line to it wherever
you want FileChucker's output to appear:
<?PHP virtual("/cgi-bin/filechucker.cgi?encembed=yes&" . $_SERVER['QUERY_STRING']); ?>
Or if your server doesn't support the PHP virtual() function, use this line instead:
<?PHP require($_SERVER['DOCUMENT_ROOT'] . "/upload/call_fc_embed.php"); ?>
Or, if your page is a plain HTML page with an extension of .htm or .html, rename its extension to .shtml and then add the following line to it wherever you want FileChucker's output to appear:
<!--#include virtual="/cgi-bin/filechucker.cgi?encembed=yes&$QUERY_STRING" --> -
In your filechucker_prefs.cgi file, set $PREF{here} = '/mypage.php' or
'/mypage.shtml', where the value is the URL (starting with a slash) to the
page within your website where you've embedded FileChucker.
Now visit www.yoursite.com/mypage.php (or shtml) and you'll see FileChucker in the page.
Embedding Method B: call filechucker.cgi directly, and let it display your HTML template file:
If your server doesn't support the PHP/SSI/shtml that's necessary for Embedding Method A (above), then you can use an HTML template file instead. Your page will look exactly the same as with Method A; the difference is that Method B requires you to use the full URL to the CGI script itself, and not use the /upload shortcut URL, since your server doesn't support any way to use that.
First you create an HTML file in whatever way you normally create web pages. Name this file encodable_app_template.html. In the <body> section of the file, wherever you want FileChucker's output to go, put the string %%encodable_app_output%%. Then upload this HTML file onto your website in its top level (i.e. not in a subfolder).
Now open your filechucker_prefs.cgi file and find the $PREF{encodable_app_template_file} setting; set that to "%PREF{DOCROOT}/encodable_app_template.html";
Now visit www.yoursite.com/cgi-bin/filechucker.cgi and it'll use your template file.
Embedding Method C: hard-coding FileChucker's HTML into your own page:
If you're on a really pathetic server that supports none of the above methods, you can simply visit yoursite.com/cgi-bin/filechucker.cgi in your browser, then view the source code, and then copy and paste it as a hard-copy into your own page. However, this will only work for the upload form, not the file list page, etc, and of course any active features (such as anything based on login status) won't work, since FileChucker's code is not executing in this case. And note that if you do this, any subsequent changes that you make to the prefs will not be reflected in your page, since you hard-coded the HTML from a previous execution of FileChucker, so if you do change your prefs in a way that affects the upload form, you'll need to re-do the hard-coding of your page from FileChucker's new source code.
[ Top – FC Homepage – Instructions – Download – Buy ]
How do I embed FileChucker's sub-pages, such as the download page?
This happens automatically when you embed FileChucker itself, because all of its sub-pages are accessed via URL variables (e.g. ?action=listfiles) on the end of your embedded page URL. So by adjusting $PREF{here} as instructed in the embed FAQ, your download page for example is no longer /cgi-bin/filechucker.cgi?action=listfiles but is instead /mypage.php?action=listfiles -- it's embedded automatically because you embedded the whole app. So there is no need to separately embed every individual sub-page; indeed that would be pretty difficult since there are dozens of them.
But if you insist on doing separate embeds (which is unnecessary in 99.9% of cases), you can do it by following the regular embed instructions for your additional URLs, and including the URL variables for that specific page (e.g. ?action=listfiles) within the call to virtual(), or by setting $custqs="action=listfiles"; in the PHP code before calling require().
[ Top – FC Homepage – Instructions – Download – Buy ]
Errors
I get an Internal Server Error!
If this happens after you edit your filechucker.cgi file, then the simple solution is: don't change filechucker.cgi at all. Instead, only edit filechucker_prefs.cgi, as explained above.
But if you haven't edited your filechucker.cgi file and you still get an Internal Server Error, or if you absolutely need to edit filechucker.cgi, then see the Internal Server Error page for solutions to this problem, which is most likely caused by an installation issue and not a problem with FileChucker itself.
[ Top – FC Homepage – Instructions – Download – Buy ]
I get an "undefined function virtual", "request execution failed", or "exec disabled" error.
The "undefined function virtual" error means your server doesn't support PHP's virtual() function. This is only a minor issue, and it is not a problem with FileChucker itself. It just means you need to use a different method for calling FileChucker from a shortcut URL. (See the shortcut FAQ item for more details and alternatives to the virtual() function, but read the rest of this FAQ item first.)
The "exec() has been disabled" (supposedly for "security reasons") error means your server doesn't support PHP's exec() function. This is only a minor issue, and it is not a problem with FileChucker itself. It just means you need to use a different method for calling FileChucker from a shortcut URL. (See the shortcut FAQ item for more details and alternatives to the virtual() function, but read the rest of this FAQ item first.)
The "request execution failed" error most likely means that your filechucker.cgi isn't installed quite right.
In all of these cases, the first thing to do is get FileChucker itself installed and working: visit www.yoursite.com/cgi-bin/filechucker.cgi and make sure that works. Only after that works properly should you try to get a shortcut URL working (e.g. www.yoursite.com/upload/ or www.yoursite.com/upload/index.php or www.yoursite.com/upload/index.shtml). If your filechucker.cgi gives you an Internal Server Error, it's most likely a chmod/permissions problem, but see this page for full details on how to fix it.
[ Top – FC Homepage – Instructions – Download – Buy ]
I get an error in the middle of my upload, or it never finishes.
If, during an upload, you get an error like "server cannot be found", "page cannot be displayed", "connection was reset", or "connection timed out", or if the upload simply never finishes, this is not a problem within FileChucker; rather, it's either a problem with your network connection, a problem with the server's network connection, or a problem within the server itself.
First disable the $PREF{use_iframe_for_upload} setting while debugging the problem, which may allow you to get a more detailed error message. And also disable the $PREF{enable_debug} setting, to make sure that the extra debugging code is not causing problems on your server.
On IIS/Windows servers this problem may be caused by the server's setting for CGI execution timeout. Other servers usually have no such timeout. In no case is this caused by PHP settings (php.ini, etc), because FileChucker is not written in PHP and therefore is not affected nor limited by PHP settings.
If your server is running an extremely outdated version of Perl, that can sometimes cause these kinds of issues. Try installing this test CGI script which will show you your server's Perl version and the version of its Perl CGI.pm module. If the CGI version is 1.x or 2.x, then it's ancient and there's a good chance that this is the problem. See perlhist for Perl versions & release dates, and CPAN for CGI.pm versions & release dates. If your server's versions are 4 or 5 years old or older, then it's time to upgrade or find a better hosting company.
In one case, we received a report of an antivirus program on the server causing this problem, for a user with a Windows/IIS server. Disabling AV scanning on the encdata folder solved the problem (and AV scanning still occurs after the upload is complete, so no protection is lost this way).
If you're getting errors during your uploads, in some situations it may help to set the $PREF{disable_upload_hook} setting to 'yes', and/or to set $PREF{move_tmpfile_instead_of_copying_contents} to 'no'. These settings slightly change how FileChucker processes the upload internally, and as a side-effect they can sometimes work around certain server issues. Try all 4 possible combinations of yes and no for these 2 settings.
But for the most part, these problems are all beyond FileChucker's control, and you'll need to ask your hosting company for support with them. They're typically caused by settings in the server's configuration that put limits on scripts, usually either an upload size limit, or a script execution time limit. You should do several test uploads (from multiple different computers and internet connections, if possible), noting the elapsed time and size when the data stops transferring, or when the error occurs. That may give you a clue as to whether you're dealing with a size limit or a time limit, and you can then ask your hosting company to increase the limit. (Note that FileChucker's built-in size limit does not result in these kinds of errors.) Finally, be sure to check your server's error-log, especially if you're getting an Internal Server Error, because the error-log will often contain more detailed information than what's displayed in the browser.
[ Top – FC Homepage – Instructions – Download – Buy ]
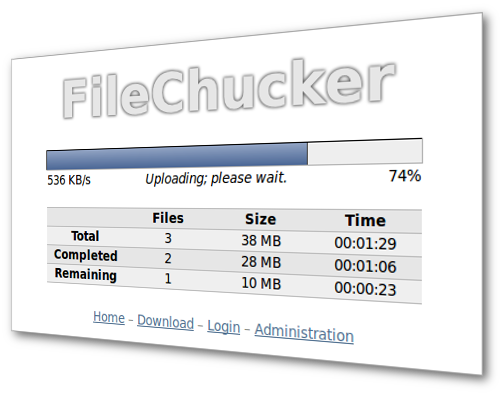
FileChucker's upload progress bar doesn't work.
FileChucker has been installed on thousands of websites, and its progress bar works properly on the vast majority of them: on both dedicated and shared servers, on Windows, Linux, Mac OS X, IIS, Apache, and Nginx servers, and virtually every major hosting company around. But on a small percentage of servers, there are Apache filters or other mechanisms that interfere with the real-time status information necessary to have a real-time progress bar, and on most of those servers, the problem can be fixed by disabling filtering in the mod_security module. On some servers this must be done by editing the global Apache configuration (e.g. httpd.conf); on others it can be done by putting the following lines in the /cgi-bin/.htaccess file:
# Turn off mod_security filtering.
SecFilterEngine Off
# The below probably isn't needed,
# but better safe than sorry.
SecFilterScanPOST Off
</IfModule>
(Note: on Dreamhost, those .htaccess lines don't work; but Dreamhost lets you achieve the same thing by unchecking the "extra web security" box in the domain/hosting section of your Web Panel.)
On Nginx servers, that .htaccess fix won't work; instead, you'll need to put the following into your nginx.conf file:
However, in rare cases, those lines don't fix the problem. Servers in this tiny minority are generally doing some kind of write-caching which causes the uploaded file to not really get written to disk until after the whole thing is already uploaded, which makes it impossible for FileChucker to monitor the progress of the upload, and therefore impossible to display a progress bar.
FileChucker isn't doing anything unusual when it uploads files: it uses the standard facilities provided by the CGI.pm module, which is a standard Perl module. However, FileChucker can also bypass this module and do the upload in a more manual sort of way, by setting $PREF{disable_upload_hook}='yes' in PREFs Section Z in the /cgi-bin/filechucker_prefs.cgi file. Still, on some servers, neither the standard way nor the manual workaround result in a properly-working progress bar.
Sometimes an outdated Perl installation can cause this problem, so read the note above about outdated Perl versions to find out what your server's running.
You should also try disabling the $PREF{use_iframe_for_upload} setting, in case there's a server error occurring which is preventing the upload progress bar from working. With the iframe disabled, any such server error will appear in the browser window.
If none of these adjustments help on your server, then you'll need to contact your hosting company, point them to this explanation, and ask if there's anything that they can do. They can try out the FileChucker demo on this server to see how the progress bar is supposed to work.
If you can't disable the write-caching on your server, or your server has some other special circumstance that prevents the progress bar from working, you can set $PREF{upload_progress_bar_disabled} to 'yes' in PREFs Section Z.
Safari users, read the next FAQ item.
[ Top – FC Homepage – Instructions – Download – Buy ]
FileChucker's upload progress bar doesn't work in Safari.
Note: this FAQ doesn't really apply anymore, because modern versions of Safari handle uploads much better, and the progress bar usually Just Works. But this FAQ will remain here for historical reference or for anyone who's stuck with an old version.
Safari seems to be buggy in its handling of file uploads. HTTP is designed to allow client-server connections to be left open, so they can be re-used, which improves performance; but in Safari, if any such open connections exist, the upload progress bar and the file upload itself will often fail.
The workaround is to set the Connection:close; HTTP header, which FileChucker itself will do, as long as you're visiting filechucker.cgi directly. If you're using a shortcut URL, then filechucker.cgi's Connection:close; header will not be honored, so you'll need to configure your server to send that header from the page which calls FileChucker. In Apache-based servers you can do this by adding the following line to your .htaccess file:
It's simplest to add that line to your website's top-level .htaccess file, but if you're calling FileChucker from a shortcut URL like yoursite.com/upload/ then you could instead add it to your /upload/.htaccess file.
Finally, if the page FileChucker is on contains images that fail to load, that will often result in connections being left open, which triggers this Safari upload bug. For example, the images which form the drop-shadow around FileChucker's white inner section will fail to load if you failed to install them on your server during the installation process. So if you're seeing this issue, be sure you've got the FileChucker images installed.
[ Top – FC Homepage – Instructions – Download – Buy ]
I use Network Solutions and I'm having trouble.
It appears that Network Solutions misconfigures their servers as standard practice. They set the $ENV{DOCUMENT_ROOT} variable to something that isn't really the docroot, which causes problems for web applications like FileChucker. To fix this, you'll need to determine your real docroot. Download and install the info.cgi script on your server, and in its output you'll see something like the following:
DOCUMENT_ROOT: /usr/services/vux/apache/htdocs
[...]
SCRIPT_FILENAME: /data/14/1/132/68/1617942/user/1723441/cgi-bin/info.cgi
Your actual docroot is the path /data/.../1723441/htdocs (the numbers will probably be slightly different on each server). So you need to edit your filechucker_prefs.cgi file and, in PREFs Section 02, set the following:
$PREF{uploaded_files_dir_is_in_docroot} = 'no';
$PREF{uploaded_files_urlpath} = '/upload/files';
Finally, because Network Solutions also often sets the $ENV{SCRIPT_NAME} variable incorrectly, you'll also need to make one small change at the top of your filechucker.cgi file. Make a backup copy first, and then near the top, you'll see this line:
You just need to uncomment that line, which means to delete the "#" from the start of the line. Note that if you're using Windows while editing the filechucker.cgi file, you may need to use Wordpad to edit it, because other editors (particularly Notepad) will mess up the line-endings in the file, causing the server to be unable to execute it. This problem doesn't affect the filechucker_prefs.cgi file because that's not executed directly.
[ Top – FC Homepage – Instructions – Download – Buy ]
FileChucker won't thumbnail a certain image file; or, FileChucker's file-list page gets cut off partway through the list.
This is usually caused by an image file that is partially corrupt. Image corruption is a matter of degree, and depending on exactly what the corruption is, some apps will be able to ignore or work around it, while others won't.
You can usually fix the image by opening it in an image editor and then re-saving it.
In the case of the file-list page's output being truncated, you'll need to determine exactly which file is causing the problem. To do that, first take note of the name of the last (bottom-most) file that FileChucker displays successfully. Then, you can either use the Options Menu to turn off the thumbnails and see which file comes next, or you can log into your server via FTP and see which file comes next.
[ Top – FC Homepage – Instructions – Download – Buy ]
My FileChucker installation has been hacked!
FileChucker's security measures make this extremely unlikely. Note that if someone has uploaded a file to your site with a scary-sounding filename like "hacked.html", that does not mean that you've been hacked, any more than someone uploading a file named "fire.html" would mean that your server were in flames. It just means that someone uploaded a file with a scary-sounding filename. To prevent this, you can disable public uploads, or add the word "hack" to your $PREF{disallow_these_strings_within_filenames} setting.
If it's bots/spammers that you're worried about, see the next FAQ item.
Of course if you have any actual evidence that FileChucker has really been hacked, contact us and we'll investigate.
[ Top – FC Homepage – Instructions – Download – Buy ]
My FileChucker installation is getting spammed!
There are two different kinds of spam: human-created spam, and bot-created spam. You can use FileChucker's $PREF{enable_human_test} feature (which is a CAPTCHA-type test) to block spambot uploads, but of course it can't block uploads from human spammers.
FileChucker also supports blacklisting and whitelisting based on IP addresses and hostnames, which can effectively block both human spam and bot spam, if it's coming from the same set of IP addresses repeatedly. For example, if you're getting spam uploads from the two IP addresses 1.2.3.4 and 5.6.7.8, you can do:
# PREFs Section 03: Security.
#
$PREF{forced_blacklist_ip_addresses}{'01'} = '^1\.2\.3\.4$';
$PREF{forced_blacklist_ip_addresses}{'02'} = '^5\.6\.7\.8$';
Or if the spam uploads are coming from various IPs within the 1.2.3.* range, you can block them all with a single rule:
$PREF{forced_blacklist_ip_addresses}{'01'} = '^1\.2\.3\.';
Sometimes simply changing the address of your upload page can throw off the spammers, because they often operate from lists of known public-upload URLs. So try renaming your filechucker.cgi and filechucker_prefs.cgi files to something else, say files.cgi and files_prefs.cgi, and/or rename your uploads page from yoursite.com/upload to yoursite.com/files.
In many cases, you need to allow public uploads so that your clients can upload files to you; but if you're working with a FileChucker installation where public uploads aren't necessary, then you can disable public uploads which is a sure-fire way to stop spammers. Or you may be able to at least disable public downloads, which is enough to stop some spammers, when their goal is not so much to give their spam to you, but to give it to your site's visitors.
If you are receiving spam uploads that tend to always have the same filenames, you can use the $PREF{disallow_these_strings_within_filenames} setting to block them, which, depending on the spammer, may be enough to cause him/it to give up.
[ Top – FC Homepage – Instructions – Download – Buy ]
Performance
What's the biggest file that FileChucker can upload?
FileChucker itself has no limit, other than the $PREF{sizelimit*} settings which you set yourself in PREFs Section 08. But your server may have other limits, either directly in terms of file size, or indirectly in terms of CPU, RAM, or network limits or issues that cause large uploads to fail.
In general, most servers do not have upload size limits for CGI scripts as they do for PHP scripts; such PHP limits have no effect on FileChucker. Many clients are using FileChucker specifically for the purpose of uploading large files of several hundred megabytes, and even into the 1-2 gigabyte range in some cases.
Windows/IIS7 servers appear to have a low upload size limit by default (about 30 MB); you'll need to adjust the maxAllowedContentLength setting in your IIS configuration to increase this limit. It appears there may also be a MaxRequestEntityAllowed setting in IIS (perhaps IIS6-specific) that might be set to a low value, preventing large uploads.
If large uploads are failing on your server, in some situations it may help to set the $PREF{disable_upload_hook} setting to 'yes', and/or to set $PREF{move_tmpfile_instead_of_copying_contents} to 'no'. These settings slightly change how FileChucker processes the upload internally, and as a side-effect they can sometimes work around certain server issues. Try all 4 possible combinations of yes and no for these 2 settings.
The only currently known hard limits on upload size are:
- For Apache servers: Apache 1.x, 2.0, and 2.1 cannot accept uploads larger than 2 GB; for that, you must use Apache 2.2.
- Most (possibly all) 32-bit web browsers cannot upload more than 2 GB. In our testing, they simply won't respond at all when you hit the "Begin Upload" button with a file larger than 2 GB selected. In order to upload more than 2 GB at once, you'll need to be running a 64-bit browser, which means you need to be running a 64-bit operating system, which naturally means you must be running 64-bit hardware.
[ Top – FC Homepage – Instructions – Download – Buy ]
How fast can FileChucker upload files?
FileChucker has no built-in speed limit; it automatically sends data as fast as the network connection will accept it. The only exception is if your server is running an extremely old version of Perl, or if you've manually set the $PREF{disable_upload_hook} setting to 'yes', in which case there is a delay that you can control via the $PREF{sleep_time_during_nonhook_uploads} setting.
In practice, the limiting factor in most uploads will be the upstream speed limit on the visitor's internet connection. Most residential internet connections have upload speeds that are only one-tenth or one-twentieth as fast as their download speeds. As of 2008 in the US, upload speeds are often limited to as little as 32-128 KByte/s (which is 256-1024 kbit/s), even for "broadband" connections.
The server's internet connection is also a factor, but in most cases servers have very fast connections, far faster than the upload speed on the visitor's internet connection.
Sometimes an outdated Perl installation can cause slow uploads, so read the note above about outdated Perl versions to find out what your server's running.
[ Top – FC Homepage – Instructions – Download – Buy ]
FileChucker seems to be using a lot of server CPU/RAM.
This is a rare problem and there are only a few things that cause it. One is a corrupt installation of the ImageMagick Perl module. Disabling FileChucker's $PREF{try_to_use_imagemagick_*} settings will prevent it from trying to load that module. Or simply disable all of those image-related settings to rule out all the image modules.
A corrupt image file can also cause this problem, as explained in this FAQ item.
If the problem occurs specifically during uploads, then you can try increasing the $PREF{progressbar_update_delay} setting, from its default value of 700 (which is in milliseconds) to something more like 3000 or 5000. This will result in less-frequent progress bar updates, and thus fewer requests to the server.
Another potential cause is having a large number of files and/or folders (tens or hundreds of thousands, depending on the server) within your $PREF{uploaded_files_dir}. FileChucker scans this directory and does various checks against its prefs in order to determine which folders the current user is allowed to access. On most servers this doesn't use much CPU, even when there are a lot of files/folders, but on servers that are older, underpowered, or overloaded, it can slow things down. To check whether this is the cause in your case, try temporarily setting $PREF{uploaded_files_dir} to a different folder, one with few or no contents. If you can't avoid having such a large number of items in your $PREF{uploaded_files_dir}, you may be able to use the $PREF{static_writable_directories_list} setting, to prevent FileChucker from scanning the disk on every execution.
Another filesystem-related cause is having a recursive directory structure within your $PREF{uploaded_files_dir} folder. For example, if you have that set to /upload/files/, and within the files folder you have a symbolic link which points to the files folder, you've essentially created an infinite loop, so that when FileChucker (or any other app) tries to read the directory, it'll get stuck there forever (until you or the server kills it). So the fix is to delete any recursive directories within your $PREF{uploaded_files_dir}, and anywhere else for that matter.
If none of the above apply in your case, then most likely your server is simply underpowered (in terms of CPU, RAM, disk, or bandwidth) for the amount of traffic it's receiving.
[ Top – FC Homepage – Instructions – Download – Buy ]
How secure is FileChucker?
FileChucker is designed to be as secure as possible. For example, it includes built-in password protection so you can restrict access to the entire app, or just certain pages within the app. It prevents the upload of potentially dangerous file types via settings such as $PREF{disallow_these_file_extensions}, which you can adjust to be more or less permissive depending on your site's needs. It includes server commands to prevent the execution of PHP code within the uploaded files directory. It supports IP/hostname-based blacklisting and whitelisting to block pesky visitors. And it watches for potential XSS attacks, stopping when it detects one.
If you're concerned about security, you may want to consider additional measures, such as installing an SSL certificate on your website, to encrypt traffic between your website and its visitors. And you'll want to use a hosting company that keeps its server software up to date. FileChucker itself is updated pretty frequently, so you may want to get the latest version.
[ Top – FC Homepage – Instructions – Download – Buy ]
Features
Can you add feature XYZ to FileChucker?
Yes, we can usually add custom features to FileChucker; just contact us and ask.
[ Top – FC Homepage – Instructions – Download – Buy ]
How do I enable the image features (thumbnails, rotation...)?
First, you need to have at least ImageMagick or GD installed on your server. Then you need to try enabling the various $PREF{try_to_use_*} settings in PREFs Section 15.
If you have ImageMagick installed, then perhaps the easiest way to get FileChucker's image features working is via the $PREF{try_to_use_convert_*} settings. Enable those, and that might be all it takes. Or, you might need to specify the full path to the "convert" command on your server, via the $PREF{convert_command} setting. If you're running a Windows server, you may run into a problem because Windows includes a built-in convert command which is a disk utility. So you'll either need to specify the full path to the convert.exe that's within the ImageMagick Program Files folder, or else rename that convert.exe to something else like imgconv.exe, then set $PREF{convert_command} = 'imgconv.exe'.
If you can't get the image features to work using ImageMagick's convert command, then you can try the more traditional method of using either the ImageMagick Perl module or the GD Perl module. These Perl modules must be explicitly installed on your server; they are NOT automatically installed just because you have ImageMagick itself or GD itself installed. They are also unrelated to whether you have ImageMagick or GD support in your PHP installation; FileChucker is not a PHP application so anything loaded into PHP is irrelevant. If you think that you have these Perl modules installed -- or your web host / server admin tells you that they are -- but FileChucker tells you that they aren't, then that means they really aren't. FileChucker gets its information directly from Perl itself, and if Perl tells FileChucker that the module is not installed, then it's not installed. The most common sources of confusion here are 1) incorrectly assuming that you automatically have the IM or GD Perl module just because you have IM or GD itself installed, and 2) having multiple Perl installations on the server and having some modules installed under one version of Perl but the script accessing the other, in which case you need to get your Perl situation straightened out and then direct FileChucker to use the correct one (by adjusting the first line in the script).
See also:
Test ImageMagick and GD Perl Modules (and the Convert Command)
Install ImageMagick On Mac OS X
[ Top – FC Homepage – Instructions – Download – Buy ]
How do I add my own fields / text boxes to the upload form?
There are 3 different ways to do this. The first and simplest way is to use the $PREF{formfield_NN} options at the end of PREFs Section 07. This is the recommended method and is best in most cases. You just add a line like this:
$PREF{formfield_01} = 'Your Name';
There are many other options you can specify as well, but that single line is all that's strictly required.
The second way is to use the $PREF{custom_form_fields_*} settings in PREFs Section 07. This allows you to specify your own fully custom HTML code which FileChucker will include in its output. You can optionally specify custom file fields in addition to your custom text fields. You'll still need to tell FileChucker the names of the fields that you'll put into your custom HTML code, so that it knows that it should process them; to do that you can either simply put the names into the $PREF{custom_form_fields_namelist} setting, or you can create a $PREF{formfield_NN} setting for each of the fields, along with a $PREF{formfield_NN_custom}='yes' setting. See the $PREF{custom_form_fields_*} settings and their documentation for full instructions.
The third way is to use your existing HTML code on an existing page, and then embed FileChucker into that page. This method is useful when you've got an existing form that's large or complex. To make this work, you must set $PREF{custom_form_fields_namelist} or $PREF{formfield_NN} as explained in the preceeding paragraph about the second method. You must also enable $PREF{using_custom_file_elements} and set $PREF{num_custom_file_elements}, but you don't need to set any of the $PREF{custom_form_fields_*} settings. In the HTML code for your form, you must name your file elements exactly "uploadname1", "uploadname2", etc (or else adjust $PREF{filefield_namebase}, but the numbering must remain) and they must have "id" attributes set to those same values. And if you have any per-file form fields, their names and ids must end in _1, _2, etc.
For this third way, since FileChucker will be submitting the data from your existing form fields, FileChucker will need to wrap its own <form> element around those fields. This means that when embedding FileChucker into your existing page, you'll actually need to make 2 separate calls to /cgi-bin/filechucker.cgi -- one before your first form field, and the second after your final form field. (These 2 calls are separate from the ?css and ?js calls that you also need to make.) For the first of these 2 calls, you must pass ?output=firsthalf to filechucker.cgi, and for the second call you must pass ?output=secondhalf. For example:
(your form fields here)
<?PHP virtual("/cgi-bin/filechucker.cgi?output=secondhalf&" . $_SERVER['QUERY_STRING']); ?>
Or:
(your form fields here)
<?PHP $custqs="output=secondhalf"; require($_SERVER['DOCUMENT_ROOT'] . "/upload/call_fc_embed.php"); ?>
A final note for the third way: you must delete your existing <form> and </form> tags, and if you have any <table>s on your page, then you must be careful not to put one FileChucker call inside the table and the other outside of it. If you're unsure, the safest thing to do is to put the 2 FileChucker calls as far apart as possible.
[ Top – FC Homepage – Instructions – Download – Buy ]
How do I enable email notifications, or fix email-sending errors?
The short answer: once you specify a recipient address in the prefs, mail-sending just works, on the vast majority of servers. In FileChucker, just enable the $PREF{email_notifications_to_webmaster} option and then set $PREF{email_notification_recipient_1} in PREFs Section 06. There are other settings that you can adjust, but the defaults work fine on most servers.
The long answer: for multiple Encodable web applications including UserBase and FileChucker, the app will automatically try both SMTP and sendmail in order to send email. On most servers, one or both of those will work by default, so no further configuration is needed.
The default configuration is to use SMTP with the server set to "localhost" because that works on most servers. However, you may need to change that to the address of the SMTP server provided by your hosting company, or the address of the SMTP server provided by your ISP. As mentioned, if SMTP doesn't work, the local sendmail process will be tried. If you're having email problems, you may want to try setting the SMTP server to null (i.e. "") to force the use of sendmail, or setting the sendmail path to null to force the use of SMTP.
If you get an error like "Can't locate MIME/Lite.pm", this means your server is missing the MIME::Lite Perl module. Fortunately you can usually install this yourself on your website. Download the module (the latest version is probably fine, or v3.01_05 is known to work) and unzip it, then go into the directory lib/MIME/ and you'll see a file called Lite.pm. On your server, create the directory cgi-bin/perlmodules/MIME/ and upload the Lite.pm file into it. That's it!
If your SMTP server requires authentication, which it might if you get "relay" errors, then you'll also need to set the SMTP auth preferences. You'll need to specify the username and password for an email account on the server in question. On some servers, this requires installing an updated version of the MIME::Lite Perl module. MIME::Lite version 3.01_05 is known to handle SMTP auth correctly; see the previous paragraph for instrutions on how to install it.
On Windows servers, sendmail is usually not available. SMTP mail works fine, but most SMTP servers require SMTP authentication, which means you'll need the Perl modules MIME::Base64 and Authen::SASL. These are trivial to install using the ppm commands ppm install MIME::Base64 and ppm install Authen::SASL (or just run the ppm command by itself to use the graphical installer), but sometimes hosting companies are inept or just don't care about their customers, and will refuse to install these modules. In that case, you can try using Blat to send the email. Download Blat and extract its "blat" folder into the same folder where you have your filechucker.cgi file, which is typically the /upload folder on Windows servers, so you should have the files /upload/blat/blat.exe and /upload/blat/blat.dll and a few others. Now in your prefs file, set $PREF{path_to_blat} = './blat/blat.exe'; and that should do it.
With newer versions of the applications, you can make it easier to debug email issues by adding the following lines to your prefs file:
$PREF{enable_email_test}	= 'yes';
$PREF{email_test_recipient}	= 'you@wherever.com';
$PREF{email_test_sender}	= 'you@wherever.com';
Then open your browser and visit your installation of the application, and add "?do_email_test" on the end of the URL -- for example www.yoursite.com/cgi-bin/filechucker.cgi?do_email_test. This will cause the script to send an email using your current email settings, and it'll include those settings in the email, so if and when you manage to get an email to go through, you'll be able to see which settings worked. For the email_test_recipient and sender addresses, you should use a known-good email account, like your personal email address.
Finally, in some cases you may need to check your spam folder, in case your email system uses overly-aggressive spam filtering which causes good emails to be flagged.
[ Top – FC Homepage – Instructions – Download – Buy ]
How do I add an email field and send a notification email to the entered address?
First enable email notifications in PREFs Section 06, including the $PREF{email_notifications_to_userEntered_addresses} setting; then add a set of $PREF{formfield_NN} options at the end of PREFs Section 07 like this:
$PREF{formfield_01}		= 'Your email address:';
$PREF{formfield_01_shortname}	= 'email_address';
$PREF{formfield_01_email}	= 'yes';
By default, these user notification emails don't include links to the uploaded files, nor the contents of any form fields. To include those, add the variables %%filelist%% and %%formfields%% to the upload_email_template_for_user___body pref. You may want to look at the upload_email_template_for_webmaster___body pref to see how those variables are included there by default.
[ Top – FC Homepage – Instructions – Download – Buy ]
How do I make my form fields appear in the notification email?
In newer versions of FileChucker, all form fields are included by default in the webmaster emails (and can be added to the user emails) via the %%formfields%% variable in the email templates. But if you want to add individual form fields: the form fields that you added are in PREFs Section 07, and each one of them has a _shortname, for example you might have:
$PREF{formfield_01}		= 'Company:';
$PREF{formfield_01_shortname}	= 'company_name';
What you need to do is add those shortnames as variables to the email template, which is in PREFs Section 06, named $PREF{webmaster_notification_email_template} (or $PREF{user_notification_email_template}). So for the company_name field, you'd add the variable %%company_name%% to that template.
However, if the form field in question is a per-file form field -- that is,
if you've set $PREF{formfield_NN_position} = 'perfile' for it --
then you need to add the %%company_name%% variable to the filelist template
instead, which is named $PREF{webmaster_notification_email_filelist_template}
(or $PREF{user_notification_email_filelist_template}).
[ Top – FC Homepage – Instructions – Download – Buy ]
How do I make my form fields appear on the Downloads/file-list page?
First create a form field at the end of PREFs Section 07, for example:
$PREF{formfield_15}		= 'Company:';
$PREF{formfield_15_shortname}	= 'company_name';
Then enter your database details in PREFs Section 12, and enable $PREF{store_upload_info_in_database} in PREFs Section 09.
Finally, in PREFs Section 11, set these 3 prefs (note that they're commented out by default, so you'll have to uncomment them):
$PREF{custom_filelist_column_code__header}  = qq`<th>Company</th>`;
$PREF{custom_filelist_column_code__folders} = qq`<td class="cinfo"></td>`;
$PREF{custom_filelist_column_code__files}   = qq`<td class="cinfo">%%company_name%%</td>`;
If you have several custom fields that you want to display, you can do that by adding more THs and TDs, like this:
$PREF{custom_filelist_column_code__header}
 = qq`<th>Company</th><th>Phone Number</th>`;

$PREF{custom_filelist_column_code__folders}
 = qq`<td class="cinfo"></td><td class="cinfo"></td>`;

$PREF{custom_filelist_column_code__files}
 = qq`<td class="cinfo">%%company_name%%</td><td class="cinfo">%%phone_number%%</td>`;
How do I use one FileChucker for multiple forms/pages on my site?
There are two ways to do this. The first way is to simply create a second copy of your filechucker.cgi and filechucker_prefs.cgi files. You can name the copied files whatever you'd like as long as the prefs file matches the main script, for example you could name them "fc2.cgi" and "fc2_prefs.cgi". The fc2.cgi script will not load the filechucker_prefs.cgi file unless there is no fc2_prefs.cgi file; so the fc2.cgi & fc2_prefs.cgi files are a totally separate installation that you can configure and customize independently.
The second way would be to use the $PREF{other_prefs_files} settings in PREFs Section Z of your filechucker_prefs.cgi file. This method uses a single filechucker.cgi file with multiple prefs files. See the documentation with the $PREF{other_prefs_files} settings for the full instructions.
[ Top – FC Homepage – Instructions – Download – Buy ]
How do I get direct-download links instead of CGI-based download links?
The most common cause for the CGI-based download links is setting $PREF{groups_allowed_to_download} to something other than 'public'. In order for FileChucker to check for membership in the specified group, it must route the download through itself, rather than providing a direct link to the file. But in most cases, it's sufficient to set $PREF{groups_allowed_to_view_download_page} to a non-public group, which prevents unauthorized users from viewing the downloads page in the first place; it's generally difficult to download files without seeing the downloads page first. So if you're comfortable with just protecting the downloads page, rather than the individual download links, then you can set $PREF{groups_allowed_to_download} to 'public' in order to get direct-download links.
There are other settings that cause FileChucker to use CGI-based download links, though; for example, $PREF{log_all_downloads} and $PREF{send_download_notification_emails}. Any feature that requires FileChucker to perform some action upon download will of course require FileChucker to be aware of the download, which means it can't use direct links.
[ Top – FC Homepage – Instructions – Download – Buy ]
How do I prevent direct downloads?
There are three ways to approach this:
Method 1: SimplestThe first approach is to recognize that it's difficult for anyone to download files from a website unless they can get a list of the filenames. Because of this, in many cases it's sufficient to just disable the file listings, and leave the direct-downloads enabled.
This approach has the advantages of being easier on the server (since the script doesn't have to process downloads) and of allowing your intended audience to use the generally more-friendly direct-download URLs. The disadvantage is that it's possible for an unauthorized user to download files if he can correctly guess the names of the files in the upload/download folder. Depending on the lengths of your filenames (and subfolder-names) and the sensitivity of the files that you're dealing with, that's probably a relatively small risk.
To use this approach, you need to configure the server to disable file listings on your $PREF{uploaded_files_dir} folder, which is /upload/files/ by default. FileChucker includes an /upload/files/.htaccess file that does this for Apache servers that allow .htaccess commands; visit www.yoursite.com/upload/files/ to make sure it's working on your site (or if you're on an IIS server, you'll need to use the IIS Manager to disable file listings for this folder). Then you need to configure FileChucker to disable public access to its own file-listings page, by setting $PREF{groups_allowed_to_view_download_page} to something other than 'public', like 'member' or 'admin', in PREFs Section 03.
Method 2:The second approach is to configure the server to disallow direct downloads from your $PREF{uploaded_files_dir} directory (/upload/files/ by default). If your server is an Apache server that allows .htaccess commands, then edit your /upload/files/.htaccess file and add these lines to it:
RewriteEngine On
RewriteRule .* - [F]
Or if you're on an IIS server, you'll need to use the IIS Manager and/or the file manager to disable access to this folder for website visitors (but not for website scripts, i.e. FileChucker).
Either way, this will also prevent your own users from downloading any files; to work around that, enable the $PREF{download_links_go_through_FileChucker} setting in PREFs Section 11, and then adjust the $PREF{file_links_in_*} settings in the same section, setting them to something other than direct_download.
Method 3: Most SecureThe third approach is to actually move your uploads folder itself to a location on your server that's outside your website, i.e. above your DOCUMENT_ROOT. This is the most secure approach, but depending on your server setup, you may not have access to anything on the server except your website, i.e. there is no "above" the website folder which you can access. If that's the case then you'll need to use one of the other methods.
To use this approach, set $PREF{uploaded_files_dir} to the absolute path to wherever you've placed your uploads folder, and then disable the $PREF{uploaded_files_dir_is_in_docroot} setting (both in PREFs Section 02). Then enable the $PREF{download_links_go_through_FileChucker} setting in PREFs Section 11, and then adjust the $PREF{file_links_in_*} settings in the same section, setting them to something other than direct_download.
[ Top – FC Homepage – Instructions – Download – Buy ]
How do I set or reset my password?
How can I hide or password-protect certain features?
You can use FileChucker's built-in password protection, which is a password-only system, with no usernames. (If you want usernames too, then you can use UserBase together with FileChucker.) By default, there is no password. To set it, first go to http://yoursite.com/cgi-bin/filechucker.cgi?newpw and enter your desired password. This will generate a hash, which you simply paste into one of the $PREF{admin_password_hash} or $PREF{member_password_hash} settings in PREFs Section 03.
Whether you're using an external login system or FileChucker's own passwords, most features are public by default; to change that, go to PREFs Section 03 and find the list of groups_allowed_to PREFs:
$PREF{groups_allowed_to_upload} = 'public';
$PREF{groups_allowed_to_delete_items} = 'public';
$PREF{groups_allowed_to_view_download_page} = 'public';
...
Simply change the feature in question from 'public' to 'member' or 'admin'.
[ Top – FC Homepage – Instructions – Download – Buy ]
How do I give each of my users their own private folder for uploads and/or downloads?
FileChucker itself does not handle usernames, so you'll need a login application like our UserBase login system for this. UserBase allows you to create individual user accounts for each of your users, and then FileChucker can integrate with UserBase to support those accounts. So install UserBase or a third-party login system, then in FileChucker, set $PREF{integrate_with_userbase} or $PREF{integrate_with_existing_login_system} in PREFs Section 03. Then set $PREF{enable_userdirs} in PREFs Section 04, and be sure to keep $PREF{enable_subdirs} set to 'yes' in PREFs Section 05. Finally, for the $PREF{groups_allowed_to_*} settings which are set to 'public', you'll probably want to change those to 'member', in PREFs Section 03.
With this configuration, when one of your users visits FileChucker, his uploads (if you've allowed uploads) will automatically go into his own private folder, and when he views the download page (if you've allowed downloading) he'll only see the contents of his own private folder.
[ Top – FC Homepage – Instructions – Download – Buy ]
How do I specify custom folder permissions?
Enable one of the custom_folder_permissions settings in PREFs Section 03. Then, while logged in as admin, go to the downloads page. Each folder in the list has an "options" link which opens a menu, and on that menu there is a "Permissions" link. That allows you to specify custom permissions on a per-folder, per-user, and per-group basis.
Note that in most cases you should not attempt to set any custom folder permissions for the "users" folder nor any of the individual userdirs within it. If you want to use userdirs (see the previous item) and custom folder permissions on the same installation, create top-level folders next to the "users" folder (not inside it) and specify your custom folder permissions on those; then disable the $PREF{navigate_users_into_userdirs_automatically} setting, and also make sure that the $PREF{groups_allowed_to_view_top_level_of_download_page} setting includes the "member" group. This will allow each of your members to use his own private userdir, plus any top-level folders for which your custom folder permission settings give him access.
[ Top – FC Homepage – Instructions – Download – Buy ]
How do I pass external data to FileChucker?
You can include external data within any of FileChucker's $PREF settings by using the following syntax:
%COOKIE{cookie_name}
%URL{url_variable_name}
%ENV{environment_variable_name}
%SQL{{sql_select_statement_here}}
%PREF{other_pref_name_here}
For example, if you wanted to adjust FileChucker's title by passing ?customtitle=MySpecialTitle on the URL, you would set the $PREF{title} setting (in PREFs Section 07) like this:
$PREF{title} = '%URL{customtitle}';
Of course, your users can modify their URLs and even their cookie values, so you shouldn't use the URL nor cookies for passing any sensitive data.
To use environment variables to pass your own data from a PHP page to FileChucker, you must call FileChucker from your PHP page using the call_fc.php method as explained in the shortcut FAQ item. Then in your PHP page, just before calling FileChucker, use putenv() to set your variables. On most servers the environment variable name that you create must start with "PHP", so for example:
<?php
// set your variable however you want to.
$somevar = what_ever();

// put your variable into an environment var.
putenv("PHP_SOMEVAR=$somevar");

require($_SERVER['DOCUMENT_ROOT'] . "/upload/call_fc.php");
?>
Then in your filechucker_prefs.cgi file, in whichever $PREF you're adjusting, you would use %ENV{PHP_SOMEVAR} to get the value of that variable.
[ Top – FC Homepage – Instructions – Download – Buy ]
How do I pass URL variables from php/shtml to FileChucker?
If you're calling FileChucker from within a PHP or SSI/shtml page, whether it's a shortcut or an embed, any query-string variables that you specify on the URL after your page's filename will automatically be passed on to filechucker.cgi. But if you want to hard-code some particular URL variables, you can do that too. For SSI/shtml pages, just include the variables right after the CGI script name:
For PHP pages using virtual() it's much the same:
For PHP pages using call_fc.php, do the following:
[ Top – FC Homepage – Instructions – Download – Buy ]
FileChucker (sometimes) says I'm not logged in, when I really am!
When this happens, it's often in response to having clicked on a link within a notification email. It's usually caused by the URL either having, or not having, the "www." in front of your domain name. Try adding or removing the "www." and see if that fixes things.
The root cause of this problem is the way that web browsers handle cookies. A cookie set by http://yoursite.com/ cannot be read by http://www.yoursite.com/ and vice-versa, because technically those are different domains for security purposes. There's no way for an application like FileChucker to override this security setting and read the other domain's cookies.
Instead, to fix the problem, you need to configure your website itself to pick one form and stick to it: either always use http://yoursite.com/ without the "www.", or else always use http://www.yoursite.com/ with the "www." Then if someone visits the "wrong" one, the website will automatically and transparently send the visitor to the "right" one. To do this, check with your hosting company's control panel; Dreamhost for example has a simple setting for this that you can toggle. If your hosting company doesn't, and your website runs Apache, then you can add a few lines to your main .htaccess file to make it happen:
# Use this to automatically redirect
# www.you.com to just you.com:
#
RewriteEngine On
RewriteCond %{HTTP_HOST}   ^www\.you\.com [NC]
RewriteRule (.*)           http://you.com/$1 [L,R]

# Or, use this to automatically redirect
# you.com to www.you.com:
#
RewriteEngine On
RewriteCond %{HTTP_HOST}   ^you\.com [NC]
RewriteRule (.*)           http://www.you.com/$1 [L,R]
If you use this code, you don't need to go back into your individual pages and update your links to add/remove the "www." on each one. The .htaccess code will automatically do that for you, whenever someone visits the wrong domain. And it will keep the rest of the request intact, so even if the link is a long URL to some page deep within your site, that's no problem: it'll just add or remove the "www." and leave the rest of the URL unchanged.
[ Top – FC Homepage – Instructions – Download – Buy ]
How do I select multiple files at once for upload?
Click the Browse or Choose File button, and then use any of the standard methods for multi-file selection, such as shift-click, ctrl-click, dragging a box around the files with the mouse, etc. This requires a modern web browser like Firefox, Safari, or Chrome. As of mid-2011, Microsoft still has not added this capability to Internet Explorer; presumably they will get around to it someday.
A related question is: can I select an entire folder with 1 click, or select multiple folders at once? That's possible in theory, but all of this is entirely up to the browser makers; the file-chooser window is generated and controlled by the browser, and web applications like FileChucker are unfortunately not given any way to interact with the file-chooser, nor to adjust its behavior. And currently, none of the major browsers support the ability to select multiple folders, nor to select an entire folder by just clicking the folder (as opposed to selecting all the files within that folder, which is supported).
[ Top – FC Homepage – Instructions – Download – Buy ]
How do I ...
Here are the prefs & sections for some of the most commonly-asked configuration questions. Just find the appropriate section/pref in your filechucker_prefs.cgi file and then change its setting.
To make FileChucker use your shortcut URL (mysite.com/upload/):
# PREFs Section 02: Paths and Directories.
#
$PREF{here} = '/upload/';
To hide the path to your uploads directory:
# PREFs Section 03: Security.
#
$PREF{hide_path_to_uploads_dir} = 'yes';
To disable the form fields that allow the user to choose/create a subdirectory for their uploaded file:
# PREFs Section 05: Subdirectories.
#
$PREF{display_dropdown_box_for_subdir_selection} = 'no';
$PREF{show_the_create_new_subdir_field_on_upload_form} = 'no';
To change the text appearing at the top of the page:
# PREFs Section 07: Upload Form Configuration.
#
$PREF{title} = '<div id="title">FileChucker</div>';
To change the max/default number of files to be uploaded:
# PREFs Section 08: Upload Restrictions.
#
$PREF{max_files_allowed}		= 5;
$PREF{num_default_file_elements}	= 1;
To change the limit on how big an upload can be:
# PREFs Section 08: Upload Restrictions.
# Note: 1024*1024*30 is 30 MB, 1024*1024*50
# is 50 MB, etc.
#
$PREF{sizelimit_for_strangers}	= 1024*1024*30;
$PREF{sizelimit_for_members}	= 1024*1024*50;
$PREF{sizelimit_for_admins}	= 1024*1024*80;
To limit the kinds of files that can be uploaded/displayed:
$PREF{only_allow_these_file_extensions} = '';
$PREF{disallow_these_file_extensions} = '.exe .php .cgi';
$PREF{allow_files_without_extensions} = 'yes';
$PREF{disallow_these_strings_within_filenames} = '\.exe \.php, \.cgi';
To send the upload information to another page after upload is complete:
# PREFs Section 10: Post-Upload.
#
$PREF{after_upload_redirect_to} = '/mypage.php';
$PREF{pass_original_querystring_through}= 'yes';
$PREF{pass_filenames_on_redirect}	= 'yes';
$PREF{pass_formfield_values_on_redirect}= 'yes';
[ Top – FC Homepage – Instructions – Download – Buy ]
Integration
How do I integrate FileChucker with UserBase?
First install UserBase, then in your filechucker_prefs.cgi file, enable $PREF{integrate_with_userbase} in PREFs Section 03. Then, in the same section, you'll probably want to change most/all of the $PREF{groups_allowed_to_*} settings from 'public' to 'member'. And if you want private per-user subfolders, then set $PREF{enable_userdirs} in PREFs Section 04.
[ Top – FC Homepage – Instructions – Download – Buy ]
How do I integrate FileChucker with CornerStore?
See this item in the CornerStore FAQ.
[ Top – FC Homepage – Instructions – Download – Buy ]
Can I make FileChucker work with my existing login system?
UserBase is generally the best login system to use with FileChucker. However, FileChucker can also read login information from many other login systems. In PREFs Section 03, enable the $PREF{integrate_with_existing_login_system} setting, and then enable one of the following methods to communicate with your login system:
$PREF{enable_username_from_cookie}
$PREF{enable_username_from_environment_variable}
$PREF{enable_username_from_cgi_script}
$PREF{enable_username_from_php_session}
$PREF{enable_username_from_apache_auth}
Most of those methods are pretty self-explanatory and don't require any special setup. For enable_username_from_php_session, you'll first need to figure out how to make your PHP login system tell you the username of the logged-in user. This will be different for each different login system, but for the purposes of this guide let's assume that the following PHP code will get the username from your login system:
<?php
$username = get_the_username();
?>
Joomla users: according to the Joomla documentation, the following should work for you:
<?php
$username = '';
$user =& JFactory::getUser();
if(!$user->guest)
{
	$username = $user->username;
}
?>
Once you've got the username, you just need to call the filechucker.cgi script from your PHP page using the call_fc.php method as explained in the shortcut FAQ item:
<?php
$username = get_the_username();
putenv("PHP_ENC_USERNAME=$username");
require($_SERVER['DOCUMENT_ROOT'] . "/upload/call_fc.php");
?>
That will work on most servers, but unfortunately some hosting companies cripple their servers by disabling PHP's exec() function, so that call_fc.php won't work. If you're stuck on a server like that, you'll need to either use UserBase, or switch to a better hosting company.
[ Top – FC Homepage – Instructions – Download – Buy ]
Does FileChucker work with iWeb, or other 3rd-party website editors?
FileChucker works fine on websites created with 3rd-party tools like iWeb, as long as the server itself is a standard kind of server supporting standard features (namely Perl CGI scripts). Because FileChucker is a web application, not simply a web page, it's not created nor edited via iWeb, but it can be embedded into any of your iWeb pages, so that it appears within your own layout, and thus matches the style of the rest of your site. Similarly, you would not need to use iWeb to configure FileChucker, because all configuration is handled by simply editing the filechucker_prefs.cgi file, which is a plain text file that can be edited in any text editor.
[ Top – FC Homepage – Instructions – Download – Buy ]
How do I integrate FileChucker with WordPress?
To embed FileChucker within a WordPress page, go to your WordPress admin page, then to the Plugins page, and look for one called "PHP Execution" or similar, and enable it.
Next, use the WordPress web-based page editor to add the following line to the page/post where you want FileChucker to appear:
Or if your server doesn't support the PHP virtual() function, use this line instead:
Now you'll need to add FileChucker's Javascript and style to your page, by putting the 2 lines below into your page's head section. You can use a WordPress plugin like "Per page add to head" for this. Or you can do it manually, by editing the file wp-content/themes/<themename>/header.php (via Appearance -> Editor in WordPress) and adding the following 2 lines to the page's <head> section:
<link rel="stylesheet" type="text/css" media="all" href="/upload/appdata/fc.css" />
Optional: if you only want those head lines to load on the specific page where you've embedded FileChucker, for example www.yoursite.com/pages/upload/ , then wrap them in a PHP if/endif like this:
<script type="text/javascript" src="/upload/appdata/fc.js"></script>
<link rel="stylesheet" type="text/css" media="all" href="/upload/appdata/fc.css" />
<?php endif;?>
Finally, in your FileChucker prefs, set $PREF{here} to '/pages/upload/' or whatever the URL is for the page where you've embedded FileChucker.
Some WordPress installations have a bad habit of inserting random <br /> and <p> tags all over your pages, which can break FileChucker's output. To fix this, install a WordPress plugin like "Toggle wpautop" or "wpautop control"; these allow you to disable the "wpautop" behavior on a per-page basis, so you can disable it on just your FileChucker page.
[ Top – FC Homepage – Instructions – Download – Buy ]
Does FileChucker work with Drupal?
Yes, FileChucker works fine on sites running Drupal. Just install FileChucker according to the normal installation instructions. You can then either use FileChucker directly, without going through your Drupal theme/layout, by using its /cgi-bin/filechucker.cgi and/or /upload/ URLs; or, you can embed FileChucker within one of your Drupal pages, by using the "PHP code" option in the "Text format" drop-down in Drupal's page editor, and inserting the PHP embed code into your page. (For the ?js and ?css lines, ideally you'd insert those into the <head> section of your page, but the Drupal editor doesn't appear to support that currently, so you can just include those lines within the page body/content area, just before the PHP code.)
[ Top – FC Homepage – Instructions – Download – Buy ]