
Passwords stink. At least, most passwords do. Are you one of the many people who use embarrassingly-weak passwords like "123456" or "password"? If so, the bad news is, you might already have had your bank account hacked or your identity stolen, whether you know it yet or not. And here’s some more bad news: even your super-clever "m0nk3y55"-type passwords aren’t much more secure.
The good news is, using strong passwords really isn’t hard. Sure, it’s less convenient, but it’s definitely doable.
There are two good solutions: first, if you just can’t be bothered to use strong passwords, and you don’t mind giving up control of your passwords to a third party, then you should use LastPass. This lets you use a single strong master password, which is the only password you need to remember, because the LastPass software automatically generates and autofills a unique strong password for each website that you visit.
But what if you don’t want to give up control of your passwords? What if you don’t want to trust them to a third party like LastPass? The second solution is just a bit harder: use a strong, unique password for each website that you visit.
At first, that sounds hard: I have to remember dozens of different passwords?? Actually, you don’t; you just need to create and remember a password formula. This is a simple formula, whose goal is just to create a password that’s long (~20+ characters) and that changes for each website.
Start by picking three words, any three words, as long as they’re not too short. For example: purple bicycle snowstorm.
Next, look at the website you’re using, say gmail.com. Take part of that website, say the last two letters ("al"), and insert them between your first two words.
Then to get some numbers, take the length of the website name ("gmail.com" contains 8 characters) and put that between your last two words.
Result: your password for gmail.com is "purple al bicycle 8 snowstorm". This password is far more secure than most, because it’s too long to be quickly/easily cracked, and because it’s different for each site, so when a website’s password database gets stolen -- which happens pretty often -- the thieves will only get this one password, not your password for every site that you visit.
And the beauty of it is you don’t have to struggle to remember a bunch of different passwords; you just need to remember your formula, which is pretty easy once you’ve used it a few times.
If you want to get even more advanced, you can find more details on password strengthening at Steve Gibson’s Password Haystacks page at GRC.
Some websites display really obnoxious stuff: moving/flashing images, auto-playing videos, etc. These are usually advertisements, and on many websites they’ve gotten so bad that it’s impossible to concentrate on reading the actual content on the page.
You can cut down on 90% of this stuff by installing two add-ons/extensions in your web browser: one is a Flash blocker (since many ads are created with Flash), and the other is an ad blocker. Just go into your browser’s settings and look for the Add-Ons or Extensions section, then search for Flash block or ad block. (Most Flash blockers allow you to still view Flash content that you actually want to view: they simply replace each Flash element with a place-holder, which you can click on if you want to run the Flash behind it.)
But there’s another option, for one-off situations, or deleting things that aren’t necessarily ads, or aren’t Flash. In browsers like Google Chrome (or Firefox with the FireBug add-on), you can simply right-click on any part of any web page, choose Inspect, and then hit the Delete key on your keyboard. Problem solved!
I like the latter approach because I know some websites depend on revenue from advertising, so I don’t necessarily want to block all ads. However, when a website decides to run ads that are obnoxious, then they’ve crossed the line, and I have no qualms about blocking ads on such sites.
Encodable Industries Reaches Two Million Visitor Milestone
As you can see in the VisitorLog stats at the bottom of this page, encodable.com just passed a big milestone: two million visitors served! When we hit the first million, I put together some maps showing the cities and countries where our clients from the past few years are located, and I did that again this time:
US clients:
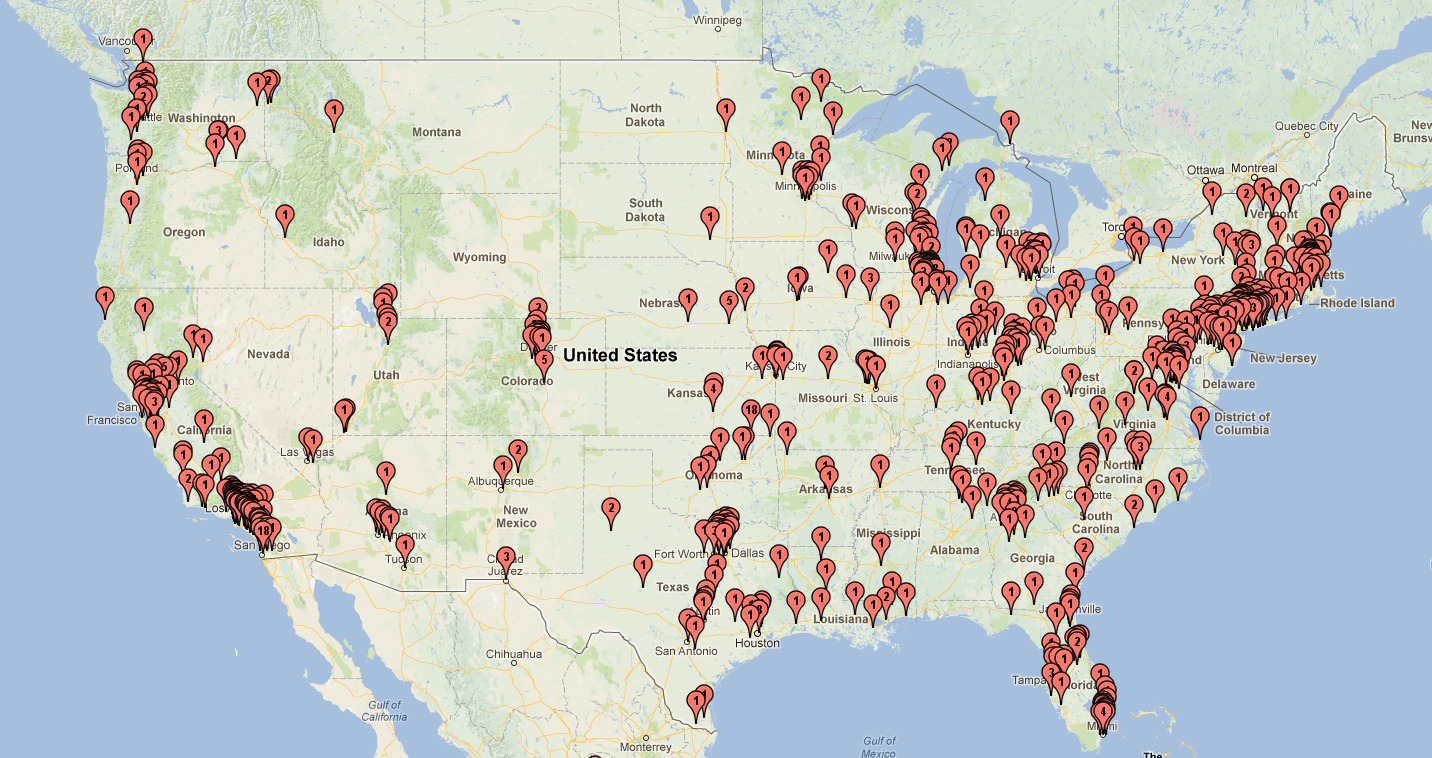
Global clients:
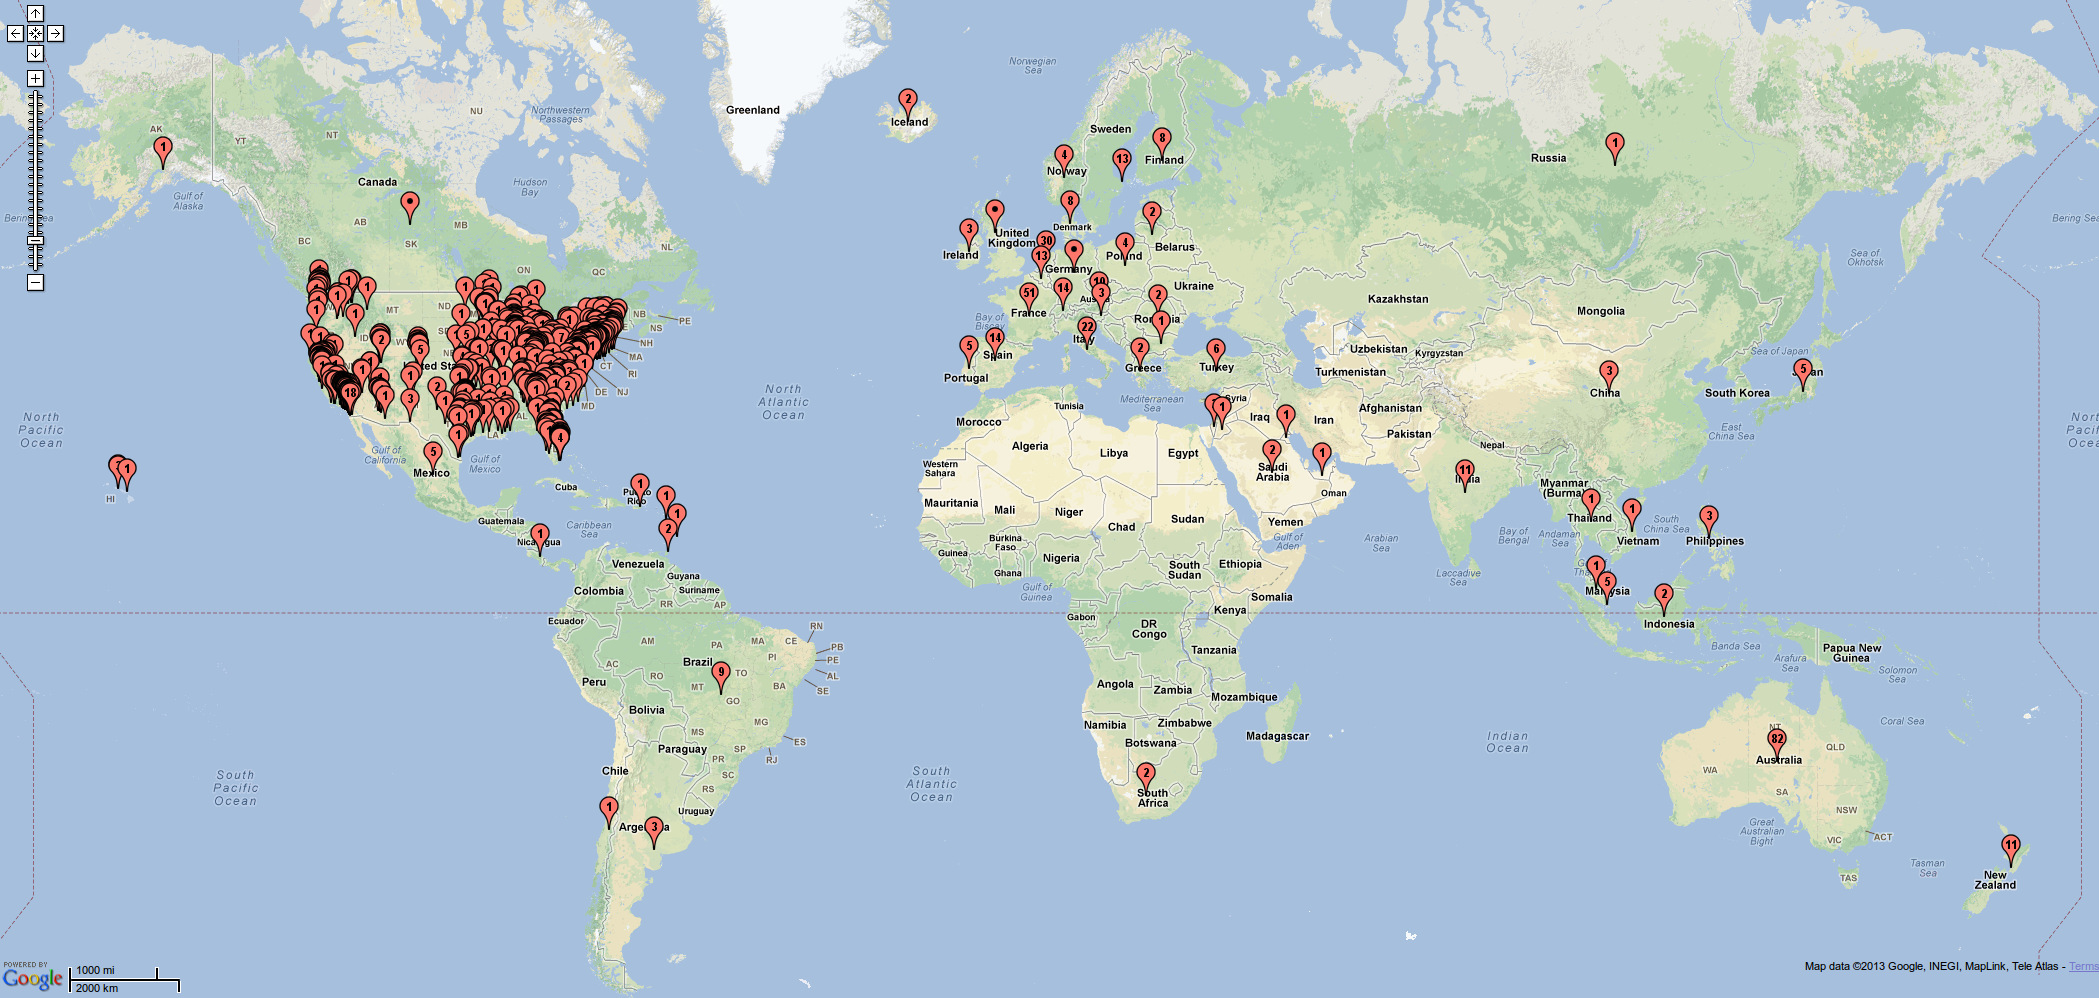
Thanks to all of our great clients for making this happen. If you’re not a client yet, what are you waiting for? Grab a Chucker, or a store, get some hosting, and get going!
There are lots of people asking this question on the internet, and lots of other people purporting to answer it. But the answer is often wrong, or at least, it’s not addressing what the questioner is really asking.
In MySQL, when you define a column as NOT NULL, it doesn’t mean "this column must have a value." It doesn’t mean "this column can’t be blank." What it actually means is that the column will not accept the special MySQL value called NULL. And in most cases, that’s a good thing; in most cases, you should define your columns as NOT NULL, unless you fully understand NULL values and you have a good reason for wanting to allow them.
This can be confusing because NULL seems like it might be the same as 0, or the same as "" (the empty string), but in fact it’s a totally different value. To MySQL, 0, "", and NULL are three different values, even though they all kinda mean "nothing." And the NOT NULL specification on a column has nothing to do with 0 nor with "". You can insert a 0 or a "" into a column defined as NOT NULL; the only thing you can’t insert into it is NULL.
As you can see, NULL is basically one giant pain in the butt. And that’s why NOT NULL is good: it means "I never want to deal with this nonsense, so I forbid NULLs from being stored." Then, you can just deal with your data as it really exists: for strings, they can be empty ("") or not empty according to the needs of your application; integers can be zero or non-zero. And there will never be any pesky NULLs to screw up your database queries.
Convert ext3 to ext4 for Much Faster Disk Checks
Now that ext4 has been in the mainline Linux kernel for a while, and has become the default filesystem (replacing ext3) in Ubuntu, I decided to use it when creating a new filesystem on a backup disk recently.
I was blown away by how much faster the fsck operation is on ext4 compared to ext3. For a partition of a few hundred gigabytes, where the fsck took around an hour on ext3, it took about a minute on ext4. Apparently, overall performance is improved too, but this improvement in the filesystem-check process is just incredible.
To convert an existing ext3 filesystem to ext4, you just need a single command, followed by an fsck:
tune2fs -O extents,uninit_bg,dir_index /dev/sdXX
e2fsck -fD /dev/sdXX
Of course replace "sdXX" with your actual device name. You can also include the -C0 option to e2fsck if you want a progress bar for the operation. And note this from the kernel.org wiki:
Running fsck will complain about "One or more block group descriptor checksums are invalid" - this is expected and one of the reasons why tune2fs requests to fsck.
See this Ubuntu help page for more details, including how to do this conversion for your active root filesystem.
Do you have any passwords that you never change? Change them now, on New Year’s Day. Your password is the only thing protecting your bank account from crooks, so if you never change it, or if you use a weak password, you’re just asking for trouble.
You’re also asking for trouble if you use the same password on multiple different websites. In that case, someone who hacks/steals your password for one site now has access to all of your accounts. Fortunately there is a relatively easy way to protect against this: use a "base" password but tweak it slightly for each different website you use.
For example, say your base word is "driveway". By itself that’s a horrible password because a) it’s too short, and b) it’s in the dictionary. You can make it much more secure by taking, say, the first 2 letters of the website where you use the password, and injecting them into it. For example, if your bank’s website is www.toobigtofail.com, then you’d take the first 2 letters ("to") and put them into the password, resulting in "drivetoway".
Now just repeat that for every website you use, and you’ve solved the same-password-for-every-site problem, yet you still only really have to remember one password. Of course there’s still a lot of room for improvement here -- ideally you’d have some uppercase letters and some numbers in the password as well -- but by simply increasing the length from 8 to 10 characters and by using a different password for each site, you’ve vastly improved the security of the password.
How To Create a BIOS Update Boot CD (or Floppy) using Linux
Download this FreeDOS bootable floppy disk image named FDOEM.144.gz. Unzip it, which will give you a file called FDOEM.144. Mount FDOEM.144 on a temporary mount point:
mkdir ~/tmp_mount_point
sudo mount -o loop FDOEM.144 ~/tmp_mount_point
Download your BIOS update from your motherboard manufacturer’s website, which should consist of a FOO.BIN file and a FLASH.EXE file (of course the actual filenames will differ). Copy those 2 files into the ~/tmp_mount_point/ directory, then unmount it:
umount ~/tmp_mount_point
Now the FDOEM.144 file contains your BIOS update files, so you just need to write it to a bootable disk/disc. To write it to a floppy disk, assuming that /dev/fd0 is your floppy:
dd if=FDOEM.144 of=/dev/fd0
Or to write it to a CD, you first need to create an ISO image file from it:
mkisofs -o biosupdate.iso -b FDOEM.144 FDOEM.144
Now just write the biosupdate.iso file to a CD. In Ubuntu (Gnome), right-click it and choose "Write to Disc..."; or you can use any CD-writer app (K3B, Brasero, etc) to do it.
I recently tried to run SpinRite on a large SATA disk. It booted OK and I was able to select the partitions and choose the SpinRite run level, but as soon as it tried to start the scan, it printed an "Invalid Opcode" error followed by a bunch of register addresses or memory locations. This was on the "Selecting Drive For Use" screen. SpinRite (and the system) was locked up at that point.
It turned out to be an easy fix: I just had to go into the BIOS, to the SATA mode setting, and change it from IDE to AHCI. When I did this and then booted SpinRite again, I noticed that a bunch of the drive fields (hardware addrs, hardware irq, etc) were now listed as "unknown", but SpinRite was able to scan the disk now.